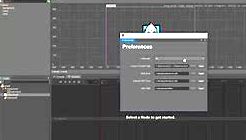
Cocos Creator offers a set of tools and features to help manage your game development project effectively. Here's a guide on using project management features in Cocos Creator:
1. Creating a New Project:
- Open Cocos Creator and use the "New Project" option to start a new project.
- Choose a project name, location, and template that suits your game type.
2. Scene Management:
- Use the Scene panel to create and manage different scenes in your game.
- Scenes contain the various elements of your game, such as characters, objects, and environments.
3. Hierarchy Panel:
- The Hierarchy panel displays the hierarchy of nodes within a scene.
- Nodes can be game objects, UI elements, or other entities in your game.
- Organize nodes hierarchically to represent their relationships.
4. Assets Panel:
- The Assets panel manages all assets used in your game, including images, sounds, and scripts.
- Import assets by dragging them into the Assets panel or using the "Import" button.
5. Prefab System:
- Prefabs are reusable game object templates. Use them to create consistent instances of objects throughout your game.
- Changes to a prefab can be automatically applied to all instances.
6. Code Organization:
- Organize your game logic using scripts attached to nodes.
- Group related scripts and assets within folders in the "assets" directory.
7. Version Control:
- Use version control systems like Git to manage changes to your project.
- Cocos Creator has built-in Git support for versioning your project.
8. Build and Deployment:
- Use the "Build" menu to export your game for various platforms (e.g., HTML5, Android, iOS).
- Test your game on different platforms to ensure compatibility.
9. Animation and Timeline:
- Utilize the Animation panel to create and manage animations for game objects.
- The Timeline panel helps you visualize and edit keyframes over time.
10. Physics System:
- Cocos Creator includes a physics system for handling collisions, gravity, and other physical interactions.
- Add colliders to nodes to enable physics interactions.
11. Testing:
- Use the built-in simulator to test your game within the Cocos Creator editor.
- Regularly test on actual devices and browsers to ensure cross-platform compatibility.
12. Optimization:
- Optimize your game for performance by considering factors like rendering, asset sizes, and script efficiency.
- Use the Profiler to identify and address performance bottlenecks.
13. Documentation and Community:
- Refer to the official Cocos Creator documentation for detailed information on features and workflows.
- Engage with the Cocos Creator community through forums and discussions for support and best practices.
14. Backup and Recovery:
- Regularly back up your project files to prevent data loss.
- Know how to recover from backups in case of unexpected issues.
15. Cocos Services:
- Explore Cocos Services for additional features like analytics, advertising, and multiplayer services.
Effective project management in Cocos Creator involves a combination of proper organization, version control, testing, and optimization. Regularly check for updates and improvements in the Cocos Creator engine and follow best practices to ensure a smooth development process.
'game engine' 카테고리의 다른 글
| Cocos Creator game design (0) | 2023.10.06 |
|---|---|
| Cocos Creator UI development (1) | 2023.10.06 |
| Cocos Creator engine features (0) | 2023.10.06 |
| Cocos Creator HTML5 game development (0) | 2023.10.06 |
| Cocos Creator animation system (0) | 2023.10.06 |


