Setting up animations in Cocos Creator involves creating animations for various properties of game objects using the Animation panel. Here's a step-by-step guide to set up the animation system in Cocos Creator:
1. Open Your Project:
Open your Cocos Creator project and make sure you have a scene with the nodes (game objects) you want to animate.
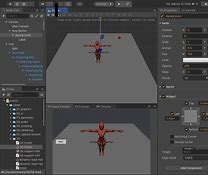
2. Access the Animation Panel:
- In the top menu, click on "Window" and select "Animation" to open the Animation panel.
3. Create a New Animation:
- In the Animation panel, click on the "+" button to create a new animation.
4. Select Target Nodes:
- In the Animation panel, you will see a list of nodes in your scene.
- Select the nodes you want to animate. You can animate properties of multiple nodes simultaneously.
5. Keyframe Animation:
- Move the playhead to the starting frame (0).
- For each property you want to animate, set the initial value by clicking the "Add Property" button and selecting the property (e.g., position, scale, opacity).
- Set the initial value by adding a keyframe at the starting frame.
6. Add Keyframes:
- Move the playhead to a different frame.
- Adjust the properties of the selected nodes.
- Click the "Add Property" button again to add a keyframe at the current frame for the changed property values.
7. Timeline Editing:
- Use the timeline to navigate and edit keyframes.
- Drag keyframes to adjust their timing.
- Right-click on a keyframe for additional options like copying, pasting, or easing.
8. Preview Animation:
- Click the "Play" button in the Animation panel to preview your animation.
- Use the controls to play, pause, or step through frames.
9. Repeat for Other Properties:
- Continue adding keyframes for other properties and adjusting their values over time.
- Experiment with easing functions to control the interpolation between keyframes.
10. Add Animation Events (Optional):
- You can add events to trigger specific actions at certain points in the animation. Right-click on the timeline to add an event.
11. Save Your Animation:
- Once you're satisfied with your animation, save your scene.
12. Testing:
- Test your animation in the Cocos Creator editor by playing the scene.
- Debug any issues using the console for error messages.
13. Export and Use in Code (Optional):
- If you want to control the animation through code, you can export the animation and use it programmatically.
This basic guide should help you get started with the animation system in Cocos Creator. For more advanced features and details, refer to the official Cocos Creator documentation.
'game engine' 카테고리의 다른 글
| Cocos Creator engine features (0) | 2023.10.06 |
|---|---|
| Cocos Creator HTML5 game development (0) | 2023.10.06 |
| Cocos Creator game development (0) | 2023.10.06 |
| Cocos Creator for Beginners Tutorial (2) | 2023.10.06 |
| Choosing Unity Build Support (0) | 2023.10.06 |


